Blog

  • I discovered a new AI model DeepSeek-R1-0528-Qwen3-8B

    DeepSeek-R1-0528-Qwen3-8B: The Definitive Guide to Building Your Local AI Empire

    Welcome, fellow AI enthusiasts and tech tinkerers! If you’re here, you already know that cloud-based AI, while powerful, isn’t always the answer. Whether you’re chasing ultra-low latency, absolute data privacy, or just the thrill of harnessing raw computational power on your own hardware, local AI is where the magic happens. Today, we’re diving deep into the latest model on the block—DeepSeek-R1-0528-Qwen3-8B—and exploring how to leverage it in your own custom setup.

    This guide will walk you through every stage: from understanding the model itself, to assembling your hardware, configuring the essential software, and even optimizing your setup for the highest level of performance. Grab a cuppa, settle in, and let’s build an AI system that not only performs like a pro but also gives you complete control over your data and processes.

    1. Meet the Model: DeepSeek-R1-0528-Qwen3-8B

    At the center of our journey is the DeepSeek-R1-0528-Qwen3-8B model—a distilled version of the full DeepSeek-R1-0528. Here’s what sets it apart from other AI models:

    A. What is DeepSeek-R1-0528-Qwen3-8B?

    This model is built by continuing the post-training on the Qwen3 8B Base model using the advanced Chain-of-Thought (CoT) methodology harvested from DeepSeek-R1-0528. In simpler terms, it incorporates refined reasoning strategies that let it perform incredibly well on complex logic puzzles, code generation, and mathematical problem-solving—often outperforming comparable models by a notable 10%.

    B. Core Capabilities

    • Tool Use: Seamlessly integrates with external APIs, plugins, or any digital toolkit you throw its way.
    • Advanced Reasoning: Excels at multi-step logic, abstract reasoning, and complex problem-solving challenges.
    • Efficiency and Performance: Despite being an 8B-parameter model, its post-training with CoT allows it to match benchmarks typically reserved for much larger models (like the Qwen3-235B-thinking).
    • Domain Focus: While it’s designed as a general-purpose “llm,” its performance on benchmarks like AIME 2024 makes it a standout for academic and industrial tasks alike.

    In a nutshell, DeepSeek-R1-0528-Qwen3-8B offers state-of-the-art performance while keeping resource usage manageable—making it ideal for a powerful local setup.

    2. The Hardware: Your Local AI Powerhouse

    Before diving into software and configurations, it’s vital to have a robust hardware foundation. Here’s what I use, and what I recommend if you’re planning to replicate this setup:

    A. My System Specs

    For optimal performance, I run my local AI on a Windows PC with the following impressive specifications:

    ComponentSpecification
    CPURyzen 7 8700G APU
    RAM256GB
    GPUAMD RX 7800 XT with 16GB VRAM
    StorageHigh-speed SSDs for fast data access
    Table: My High-Performance AI Setup

    With these components, I can run intensive inference tasks, manage multiple containers, and even accommodate full GPU offload for the AI model without breaking a sweat.

    B. Why the Hardware Matters

    The enormous 256GB of RAM ensures large datasets and models are handled efficiently, while the 16GB VRAM on the AMD RX 7800 XT guarantees that even the most demanding graphical and computational tasks are smooth and responsive. The Ryzen 7 8700G provides the processing power needed for orchestrating tasks and managing simultaneous operations such as running Docker containers and automation tasks on N8n.

    3. The Software Ecosystem: Tools to Power Your Setup

    Hardware alone cannot make your local AI system sing. The software stack is the glue that binds your custom AI ecosystem together. Here’s a rundown of what you need and how each component plays its part:

    • LM Studio: A robust environment for managing and deploying AI models locally. LM Studio simplifies the loading, testing, and GPU offload configurations, making it easy to work with DeepSeek-R1-0528-Qwen3-8B.
    • Docker Desktop: Runs containerized services effortlessly. I host several AI services on an old laptop using Docker—this ensures that your main PC remains dedicated solely for heavy-duty inference.
    • Tailscale: A VPN-like solution that ties your devices together into one secure network. Whether it’s your phone or a secondary laptop, Tailscale lets you connect to your AI network securely from anywhere.
    • N8n: The automation hub that ties your workflows together. With N8n, you’re not just running your model; you’re automating tasks, integrating APIs, and creating a dynamic, self-sufficient system.
    • OpenWebUI: A mobile-friendly web interface that lets you interact with your AI models on the go, ensuring you’re never tethered to your desk.

    Each component is chosen for its reliability and ease of integration, ensuring that the overall system remains flexible, scalable, and, most importantly, user-friendly.

    4. Step-by-Step: Setting Up Your Local AI Network

    Below is a detailed, step-by-step guide to get your local AI infrastructure up and running. Follow along carefully to ensure a smooth setup that you can rely on for months—and even years—to come.

    Step 1: Install and Configure LM Studio

    First up, LM Studio is the core interface for your AI model. Here’s how to get started:

    • Download LM Studio: Head over to the official website and download the latest version compatible with Windows.
    • Model Installation: Load the DeepSeek-R1-0528-Qwen3-8B model into LM Studio. Since the model supports full GPU offload, make sure to enable that in the settings.
    • Configuration: Fine-tune settings such as batch size, inference speed, and memory management. Experiment with the defaults, and then adjust based on your workload and hardware specifications.
    • Testing: Run a suite of test queries to ensure that the model is responding appropriately. These tests also help gauge if the GPU offloading is configured correctly.

    Tip: Document your settings so you can refer back or share your configuration with others in the community!

    Step 2: Set Up Docker Desktop on a Secondary Machine

    Using an old laptop or a dedicated secondary machine for Docker is a smart move—it offloads background tasks and ensures resource separation. Follow these steps:

    • Install Docker Desktop: Download and install Docker Desktop on your chosen secondary machine. Ensure your operating system is up-to-date and that Docker has the necessary privileges to run containers.
    • Containerize Your Services: Create Docker containers for essential services like OpenWebUI and N8n. Here’s a simple example of a Docker Compose file to get you started:
    version: "3"
    services:
      openwebui:
        image: openwebui:latest
        ports:
          - "8080:80"
        restart: always
      n8n:
        image: n8nio/n8n
        ports:
          - "5678:5678"
        restart: always
    

    Customize this file according to your workflow and security requirements. Once set up, Docker Desktop will manage these services seamlessly, ensuring they run independently of your primary machine’s intense AI processes.

    Step 3: Secure Your AI Network with Tailscale

    Tailscale is a game-changer when it comes to secure, hassle-free remote access. Here’s how to integrate it:

    • Install Tailscale: Install Tailscale on all devices you plan to use: your Windows desktop, old laptop (running Docker), and your mobile phone.
    • Network Configuration: Tailscale creates a secure mesh network that connects all devices. Follow the on-screen prompts to authenticate and add devices to your network.
    • Test Connectivity: Access the services from your mobile device using the OpenWebUI interface. Verify that the connection is stable, fast, and secure.

    By bridging your devices together, Tailscale ensures that irrespective of where you are, you always have secure access to your local AI setup without exposing any sensitive data over the public internet.

    Step 4: Automate Workflows with N8n

    N8n is your automation engine. It enables you to create workflows that interact with your AI model, fetch data from various APIs, and streamline tasks without manual intervention.

    • Installation: Download and install N8n as part of your Docker setup or on your primary PC.
    • Workflow Creation: Create workflows that automatically trigger model inference for scheduled or event-driven tasks. For example, you can set up a workflow to process incoming data and run it through DeepSeek-R1-0528-Qwen3-8B for analysis.
    • Integration: Link N8n with LM Studio APIs, enabling seamless communication between your automation tasks and the AI model for real-time responses.

    This level of automation transforms your AI system into a responsive, always-on service capable of handling diverse tasks with minimal manual oversight.

    Step 5: Optimize Performance and Reliability

    Once your system is up and running, it’s time to ensure everything performs at its best:

    • GPU Offloading: Double-check that LM Studio is configured to utilize the full GPU capabilities of your AMD RX 7800 XT. Monitor resource usage during intensive tasks via built-in performance dashboards.
    • Memory Management: With 256GB of RAM, you have ample headroom—but always fine-tune your settings to avoid leaks and manage peak loads effectively.
    • Regular Updates: Keep your Docker images, LM Studio, and all related software updated. Often, performance tweaks and security patches are included in updates.
    • Benchmark and Test: Regularly test your model’s performance using benchmark tools and custom queries. Compare current performance against previous baselines to identify and address potential slowdowns.

    Remember: Every AI system is unique. Tailor optimizations based on your typical workloads and operational patterns.

    5. Security & Accessibility: Protecting and Expanding Your AI Network

    Building a high-powered local AI setup is exciting—but with great power comes the need for robust security and accessibility measures. Here’s how to ensure your network is both secure and easily accessible:

    • Device Authentication: Use Tailscale’s built-in identity verification to ensure that only authorized devices access your network.
    • Encrypted Connections: All Tailscale connections are end-to-end encrypted, meaning your data remains private even when accessing your network remotely.
    • Regular Security Audits: Periodically review your Docker container configurations and LM Studio logs to catch any unusual activity early.
    • Backup & Recovery: Maintain regular backups of your configurations and important data. This makes restoring your system a breeze in case of any issues.

    Taking these steps will give you peace of mind, ensuring that your local AI empire stays secure and accessible no matter where you are.

    6. Troubleshooting & FAQs: What to Do When Things Don’t Go as Planned

    Even the most carefully configured systems can run into hiccups. Here are common issues and solutions to help you troubleshoot your local AI network:

    Issue 1: Model Performance Lag

    • Potential Cause: GPU offload settings not optimized or background services consuming too much memory.
    • Solution: Revisit LM Studio’s configuration, ensure GPU offloading is enabled, and consider suspending non-critical Docker containers during intense tasks.

    Issue 2: Docker Container Crashes

    • Potential Cause: Insufficient resources on the secondary machine or configuration errors in the Docker Compose file.
    • Solution: Check container logs, adjust resource limits in Docker settings, and verify that your machine has the latest OS updates.

    Issue 3: Connectivity Problems with Tailscale

    • Potential Cause: Outdated Tailscale client or misconfigured network settings.
    • Solution: Update Tailscale on all devices, reset authentication tokens if necessary, and run a network diagnostic to isolate connectivity issues.

    If you encounter issues not covered here, document the error details and check community forums or official documentation. Continuous learning from troubleshooting makes your setup ever more robust.

    7. Real-World Applications: Transforming Your Workflow with Local AI

    What does all this mean for your daily work? Here are some compelling use cases that underscore why investing the time to set up a local AI is a game‑changer:

    • AI-Assisted Programming: With DeepSeek-R1-0528-Qwen3-8B’s advanced reasoning capabilities, you can enhance code completion, error detection, and even suggest novel solutions to complex bugs. Integrate these insights directly into your development workflow.
    • Mathematical and Logical Problem Solving: Are you tackling research problems or sophisticated logic puzzles? This model’s CoT-based reasoning makes it a perfect assistant for processing multi-step calculations and logical deductions.
    • Data Analysis and Visualization: Seamlessly combine your local AI with analytics tools to crunch large datasets in real time—perfect for academic research, market analysis, or smart business decisions.
    • Automation of Repetitive Tasks: Use N8n to trigger AI-driven actions such as automating report generation, data scraping, or even managing email responses. The integration possibilities are endless.
    • Remote and Mobile Access: Thanks to Tailscale and OpenWebUI, you’re not confined to your desk. Monitor performance, run quick scripts, or even modify workflows from your smartphone, ensuring true freedom and flexibility.

    These applications are not just theoretical—they’ve transformed my own workflow. By hosting AI locally, I bypass the typical cloud latency and gain direct control over every process, ensuring my data stays private and my responses lightning fast.

    8. Final Thoughts: Why Local AI is the Way Forward

    There’s no doubt that the cloud has its place in the world of AI. However, if you’re looking for speed, security, and total control over your computational resources, a local AI setup is the future. By adopting DeepSeek-R1-0528-Qwen3-8B into your workflow, you’re not just keeping up with trends—you’re setting the pace.

    Building this setup may involve a fair bit of tinkering, but the rewards are enormous: a custom, high-performance AI network tailored to your exact needs, free of external dependencies and ready to power everything from research to real-time automation. With the right hardware, a well-chosen software stack, and clear optimization strategies, you’ll be well on your way to creating an AI ecosystem that rivals even the most advanced cloud-based solutions.

    Remember, every element—from selecting your GPU and configuring LM Studio to setting up Docker containers and securing your network with Tailscale—is a key part of the puzzle. This comprehensive guide aims to be your definitive reference, so bookmark it and refer back whenever you need a refresher. And if you ever hit a snag, use the troubleshooting tips, share your experiences with the community, and keep pushing the boundaries of what you can do with local AI.

    As newer models and tools emerge, your local AI setup will only become more powerful and versatile. Invest the time now, and you’ll set yourself up for long-term success in this fast-evolving space.

    9. Bonus Tips to Enhance Your Setup

    Before wrapping up, here are a few extra nuggets of wisdom to ensure you get the absolute most out of your local AI infrastructure:

    • Documentation is Key: Document every step of your setup—from hardware configurations to Docker container parameters. A well-maintained log will save you hours of troubleshooting in the future.
    • Community Communication: Join forums, discussion boards, or local AI meetups. Sharing insights and challenges with like-minded enthusiasts can lead to innovative solutions and improvements.
    • Experiment Regularly: The AI field is dynamic. Test new software updates, tweak your model settings, and run periodic benchmarks. This ongoing experimentation helps maintain peak performance and adapt to future upgrades.
    • Backup Your Configurations: Whether it’s your LM Studio settings, Docker Compose files, or the N8n workflows, periodic backups can be a lifesaver in case anything goes awry.
    • Monitor Resource Usage: Utilize built-in performance monitors on your operating system or specializing monitoring tools to track CPU, GPU, and RAM usage. Effective resource management can prevent overloading and keep your system responsive.
    • Stay Updated: Keep an eye on updates for DeepSeek-R1-0528-Qwen3-8B as well as the associated software. Regular updates not only provide new features but also critical security patches.

    This bonus section is designed to help you push your setup further—turning your local AI system from a static tool into a dynamic, continuously evolving powerhouse.

    Conclusion: Your Local AI Journey Starts Now

    In this guide, we’ve covered every facet of building an advanced local AI network using DeepSeek-R1-0528-Qwen3-8B—from understanding the model’s groundbreaking features and assembling an impressive hardware setup to integrating a robust software ecosystem and ensuring your system is secure and optimized.

    If you’re serious about owning your AI infrastructure and achieving high performance without relying on third-party cloud services, this step-by-step approach empowers you to do just that. This guide is not just a static article—it’s a reference manual, a checklist, and a source of inspiration for experimenting with and mastering local AI.

    By investing your time and effort into setting up a system with full control, blazing speed, and enhanced privacy, you are positioning yourself at the forefront of AI innovation. Whether you’re enhancing your day-to-day workflow, diving into complex research projects, or creating automation that drives business growth, your local AI system is the cornerstone of your technological future.

    So, roll up your sleeves, get hands-on, and start building your local AI empire today. Bookmark this guide, keep refining your workflow, and share your progress with the community. After all, in the world of AI, evolution is constant—and so is the excitement of full control.

    Happy building, and welcome to the future of AI that’s truly yours!
  • The Ultimate Guide to Crafting AI Prompts for Social Media Success


    Why AI Prompting is the Key to High-Performing Social Media Content

    In the fast-moving world of social media, capturing attention and engaging audiences requires more than just great content—it demands precision, creativity, and strategy. This is where AI-powered content creation becomes a game-changer.

    With AI tools like Copilot, ChatGPT, and various open-source models, businesses and creators can generate compelling and highly shareable posts—but the secret to truly effective AI-generated content lies in the art of prompting.

    A well-structured AI prompt can mean the difference between generic and engaging, forgettable and viral, cluttered and crystal-clear. When done right, AI prompting helps to:

    • Enhance audience engagement through personalized and insightful posts.
    • Optimize SEO with keyword-rich content tailored for visibility.
    • Streamline content creation—reducing time spent on ideation and editing.
    • Ensure consistency in brand voice, storytelling, and messaging.

    By mastering AI prompts, you unlock an unparalleled level of content efficiency and creative flexibility—empowering you to craft posts that stand out in an overcrowded digital landscape.

    Now, let’s break down exactly how you can structure the perfect AI prompts to achieve social media success.


    1. Understanding AI Prompts: What They Are & Why They Matter

    An AI prompt is essentially a set of instructions given to an artificial intelligence model to generate a response. Think of it as the blueprint for AI output—the clearer and more detailed the prompt, the better the results.

    1.1 How AI Understands Prompts

    AI models rely on patterns, algorithms, and vast datasets to interpret prompts. Their responses are shaped by factors such as:

    • Clarity → How well-structured and direct the prompt is.
    • Context → Details provided that help refine results.
    • Constraints → Specific limitations that guide response length and style.

    1.2 Why AI Prompting is a Game-Changer

    Effective AI prompting allows you to:
    Save Time → Automate content creation while maintaining quality.
    Increase Engagement → Generate tailored posts for your audience.
    Stay Consistent → Maintain a strong brand voice.

    💡 Example: Instead of prompting AI with “Write a tweet about digital detox,” try:
    “Write a compelling tweet about the benefits of taking a digital detox. Make it concise, engaging, and end with a question to encourage discussion. Include relevant hashtags.”

    This level of specificity ensures the response aligns perfectly with social media engagement strategies.


    2. Best Practices for Writing AI Prompts That Drive Engagement

    If you want to maximize engagement with AI-generated content, follow these proven prompting techniques:

    2.1 Keep Prompts Clear and Direct

    Weak Prompt: “Write a post about productivity.”
    Strong Prompt: “Write a LinkedIn post about three scientifically backed methods to improve productivity at work. Keep it professional yet engaging.”

    2.2 Define the Purpose of Your Content

    Always specify the objective—whether it’s to educate, entertain, persuade, or start a conversation.

    💡 Example:
    “Generate an Instagram caption that inspires people to unplug from social media for a day. Make it short, motivational, and use emojis.”

    2.3 Optimize for SEO and Social Reach

    Include keywords, hashtags, and engagement triggers.

    💡 Example:
    “Write a Facebook post on ‘AI and the Future of Social Media Marketing’. Include trending industry keywords and end with a discussion question.”


    3. Case Studies: AI Prompts That Worked for Top Brands

    Case Study 1: Airbnb’s AI-Powered Content

    Airbnb uses AI-driven personalized captions to enhance engagement. Their AI prompts focus on storytelling and customer experiences.

    💡 Example Prompt:
    “Write a Twitter thread showcasing how digital nomads use Airbnb to stay connected while traveling. Make it engaging and include a call-to-action.”

    Case Study 2: Nike’s AI-Optimized Social Media

    Nike’s AI-assisted marketing relies on emotion-driven prompts to create viral posts.

    💡 Example Prompt:
    “Generate an Instagram caption about motivation and perseverance. Keep it short, impactful, and include hashtags related to fitness and mindset.”


    4. Trends in AI-Powered Social Media Content

    4.1 AI for Personalized Content

    AI is revolutionizing customized user experiences, helping brands craft posts that speak directly to audience needs.

    4.2 AI and Visual Content Generation

    Tools like Copilot and DALL·E enable image-based social media storytelling through AI-generated graphics.


    5. Common Mistakes to Avoid When Prompting AI

    🚫 Mistake 1: Vague Prompts → Avoid too-general instructions.
    🚫 Mistake 2: Ignoring SEO → Failing to optimize keywords reduces visibility.
    🚫 Mistake 3: Overcomplicating Requests → Keep prompts concise yet informative.


    6. Advanced Prompting Techniques for Maximum Impact

    6.1 Experimenting with Different Prompt Styles

    Test variations like:
    Conversational Prompts“Write a witty Twitter post about digital burnout.”
    Storytelling Prompts“Write a LinkedIn article using a case study on overcoming social media addiction.”
    Data-Driven Prompts“Write a research-based post about AI in marketing, citing recent statistics.”

    6.2 Using AI for Multilingual Social Media Content

    Prompt AI to translate and localize content for international audiences.

    💡 Example Prompt:
    “Translate this tweet into Spanish while maintaining its casual tone.”


    7. Conclusion: Master AI Prompting and Elevate Your Social Media Strategy

    AI can be an incredible tool for social media content creation—but its success depends on how well you structure prompts. By following the strategies in this guide, you can:
    Create compelling content that resonates with your audience.
    Improve efficiency and scale your content strategy.
    Stay ahead of trends with AI-driven innovation.

    💬 What’s next?

    Try experimenting with different prompts for tweets, LinkedIn posts, and Instagram captions—and watch your engagement skyrocket. 🚀


  • Unlocking AI’s Potential in Social Media


    How to Prompt for Engaging Social Media Content

    In today’s fast-paced world, producing captivating social media content can be a struggle. Artificial intelligence offers a powerful solution by generating creative and engaging posts. However, the quality of AI output depends largely on how you instruct it. In this article, we’ll explore the art of effective prompt engineering for social media, share key components to include in your instructions, and provide system prompt examples you can try with dedicated AI platforms.

    The Importance of a Well-Crafted Prompt

    Imagine giving someone a vague recipe and expecting a gourmet meal. Without clear directions, even the best tools can miss the mark. Similarly, a precise prompt helps an AI understand not only what type of content you need, but also the style, tone, and structure required to capture your audience’s attention. By specifying details such as format, tone, and desired length, you can guide the AI to create content that resonates with your target group.

    Core Elements of an Effective AI Prompt

    When designing your instructive prompt, consider including the following elements:

    • Content Format:
      Define the structure that best suits your topic. For example, you might specify:
    • How-to Guides: For step-by-step instructions.
    • Listicles: To break complex ideas into digestible tips.
    • Case Studies: For in-depth analyses and real-life examples.
    • Trend Articles: To capture current industry happenings.
    • Ultimate Guides: For comprehensive, all-inclusive coverage.
    • Desired Tone:
      The tone sets the mood of your post. Whether you need a casual, professional, humorous, or informative style, clearly stating this will ensure the AI’s output reflects your brand’s voice.
    • Content Length:
      Decide if you want a brief update or a long-form in-depth article. Instructing for “long” content encourages more detailed explanations and richer insights.
    • SEO-Optimized Titles and Introductions:
      Ask for a creative title based on targeted keywords and a captivating introduction that hooks the reader immediately.
    • Engagement with Examples and Personal Touches:
      Encourage the use of real-world examples and personal anecdotes. This human element makes the content relatable and memorable.
    • Analytical Depth:
      Request in-depth analysis and researched data to strengthen credibility. Detailed insights and expert opinions lend authority to your post.
    • Clear Conclusions and Calls-to-Action:
      A strong ending that summarizes key points and suggests further engagement—such as comments, shares, or additional reading—helps maintain the conversation with your audience.
    • Post-Generation Validation:
      For lengthy projects, instruct the AI to evaluate its own output and ask if more content is needed. This ensures your post meets your quality and length requirements.

    System Prompt Examples for Dedicated AI Platforms

    Here are some system prompt examples that you can use directly with AI tools like LM Studio or OpenWebUI:

    Example 1: Comprehensive Blog Post

    Create a long-form blog post on a given topic using the ultimate guide format. The output should include:
    1. An SEO-driven title based on long-tail keywords.
    2. A captivating introduction that outlines the benefits of reading further.
    3. A detailed breakdown of the subject, incorporating personal experiences and real-world examples.
    4. A conclusion that summarizes the key points and invites readers to engage further.
    Finally, check the overall length and prompt for additional content if necessary.

    Example 2: LinkedIn-Focused Professional Post

    Generate an engaging LinkedIn post on a specified topic, using a professional tone. The post should:
    1. Begin with an attention-grabbing title.
    2. Provide a concise introduction outlining the core idea.
    3. Offer actionable insights with clear, practical tips.
    4. End with a strong call-to-action encouraging comments and sharing.
    Ensure the content is optimized for SEO with relevant keywords.

    Example 3: Creative and Energetic Campaign Content

    Develop a creative social media post centered on a specific topic using a listicle format. The post should:
    1. Start with an engaging opening statement.
    2. Present ideas in a numbered list for easy consumption.
    3. Include relatable personal anecdotes and examples.
    4. Conclude with a question or call-to-action to drive audience interaction.
    After writing, verify the content’s length and request further instructions if a more extended version is needed.

    Final Thoughts

    Mastering the art of AI prompting is key to unlocking high-quality, engaging social media content. By clearly defining the format, tone, length, and key components of your post, you empower the AI to generate content that truly resonates with your audience. Experiment with these guidelines and system prompt examples, and don’t hesitate to iterate based on feedback. As you refine your prompt engineering skills, you’ll find that AI becomes an indispensable tool for your content strategy.

    How are you planning to integrate these strategies into your next social media campaign? Share your thoughts and let’s continue exploring the dynamic world of AI-driven content creation.


  • Demystifying AI and AI PCs: Unpacking the Future of On‑Device Intelligence

    In a world where technology continuously redefines our daily lives, artificial intelligence (AI) has emerged as a transformative force. Yet for many, the concept of AI remains shrouded in mystery—especially when it comes to the next frontier of computing: AI PCs. These aren’t your average desktop or laptop computers. AI PCs integrate traditional components like CPUs and GPUs with a crucial third element: the neural processing unit (NPU). This guide will demystify the concept of AI, explore what exactly makes an AI PC, and examine its profound impact on everything from everyday productivity to enterprise-level innovation.

    What Is an AI PC?

    Picture your typical computer: it relies on a central processing unit (CPU) and often a graphics processing unit (GPU) to manage everyday computing tasks. In the realm of AI PCs, however, there’s an added hero—the neural processing unit, or NPU. Designed specifically for handling AI workloads, NPUs bring power efficiency and unparalleled performance to tasks that require rapid data processing and decision making.

    An AI PC is engineered to execute local AI workloads optimally. What does this mean? Rather than sending data off to remote servers for processing, an AI PC processes tasks directly on your device. This on‑device approach makes it possible to run sophisticated machine‑learning models, power real‑time image and voice recognition, and even drive creative applications—all without the latency or potential privacy concerns associated with cloud computing.

    Breaking Down the Components

    • CPU (Central Processing Unit): The universal workhorse, tasked with high‑level decision making and executing general-purpose tasks. In an AI PC, its flexibility remains critical, although it isn’t optimized for the specialized computations that AI demands.
    • GPU (Graphics Processing Unit): Renowned for parallel processing, GPUs can perform many calculations simultaneously. They are commonly used to accelerate AI tasks, particularly in the field of deep learning, where enormous amounts of data need processing concurrently.
    • NPU (Neural Processing Unit): The newest kid on the block, the NPU is purpose‑built for AI tasks. It executes neural network computations much more efficiently than either the CPU or the GPU. By offloading these tasks to the NPU, your AI PC handles local workloads with improved speed and energy efficiency.

    Together, these three components create an ecosystem where AI can thrive directly on your device, whether it’s for creative software, intelligent assistants, or even advanced cybersecurity measures.

    The Local vs. Cloud Debate: Where Does AI Belong?

    One of the most frequently asked questions in today’s tech conversations is whether AI should run locally or in the cloud. Each approach offers its own advantages, and understanding these tradeoffs is essential for anyone considering an AI PC.

    Local AI: Speed, Privacy, and Personalization

    When AI workloads run locally—that is, directly on the device—they’re handled by the on‑board CPU, GPU, or NPU. This arrangement confers several significant benefits:

    • Reduced Latency: With processing happening on‑site, results are delivered almost instantaneously. This is invaluable for applications that demand immediate responses, such as voice‐activated assistants or real‑time translation apps.
    • Enhanced Privacy: Data doesn’t have to travel to remote servers, which can reduce the risk of exposure during transmission. For users handling sensitive information—whether businesses or private individuals—this is a huge plus.
    • Greater Customization: Local processing means the device can be optimized for specific tasks or applications. For instance, an AI PC used for content creation can have its software fine‑tuned to leverage local accelerators for faster rendering and image processing.

    Cloud-Based AI: Unmatched Scale and Versatility

    On the other hand, cloud-based AI relies on remote data centers that leverage an array of high‑performance hardware. This setup brings its own set of benefits:

    • Scalability: Cloud services can access massive computational resources that far exceed what’s available in any single PC.
    • Complex Workloads: For tasks that require processing huge datasets or running large‑scale simulations, cloud infrastructures are ideally suited.
    • Resource Sharing: Many popular AI services like ChatGPT and Stable Diffusion operate in the cloud, where powerful servers run complex algorithms that would be impractical to implement locally.

    The choice between local and cloud processing isn’t about one being inherently better than the other—it’s about matching the solution to the specific application and user needs. In the ideal future, hybrid approaches that combine both methods will provide the best of both worlds, offering speed and privacy alongside scale and flexibility.

    The Hardware Revolution Behind AI PCs

    The rise of AI PCs marks a significant evolution in personal computing. Manufacturers are now producing specialized hardware designed not just to process traditional tasks but to accelerate AI workloads at the local level.

    Integrated NPUs: The Game Changer

    NPUs are at the heart of this evolution. Designed to handle parallel computing tasks that mimic human neural networks, NPUs have the following crucial benefits:

    • Power Efficiency: NPUs are optimized for the types of calculations required in machine learning, meaning they can perform many operations using less power than traditional CPUs or GPUs.
    • High Throughput: With the ability to operate at trillions of operations per second (TOPS), NPUs make it possible to run advanced machine learning models in real time.
    • Task Specialization: Instead of trying to generalize every computational task, the NPU focuses exclusively on AI-related tasks, whether that’s image recognition, natural language processing, or pattern detection.

    Real-World Hardware Examples

    Recent advancements in PC hardware highlight the growing importance of NPUs and integrated AI capabilities:

    • AMD Ryzen™ AI PCs: Models in the AMD Ryzen™ Mobile 7040 Series and AMD Ryzen™ Mobile 8040 Series incorporate NPUs to handle emerging AI workloads. These processors are designed to process AI tasks locally, ensuring faster response times while preserving data privacy.
    • Intel’s AI Initiatives: Intel has showcased processors equipped with advanced NPUs as part of their AI PC developer programs. These innovations aim to bring AI capabilities directly into the everyday computing experience.
    • Qualcomm and Other Competitors: While AMD and Intel are making leaps in this area, other vendors, including Qualcomm, are equally focused on developing processors that can integrate AI at the hardware level. These developments signal a broader industry trend toward fully integrated AI PCs.

    The competition among these giants underscores the growing demand for systems that don’t just react to AI—they fundamentally embrace and execute it on the local level.

    Real-Life Applications: How AI PCs Are Changing the Game

    To fully grasp the impact of AI PCs, it helps to look at concrete examples. Whether you’re a content creator, a business professional, or an everyday user, the benefits of local AI processing can be revolutionary.

    Enhanced Content Creation

    Imagine you’re a graphic designer or video editor. Traditional PCs might require external cloud services for advanced image processing or rendering effects, which can create a lag and interrupt your creative flow. With an AI PC:

    • Real‑Time Processing: Software can leverage the dedicated NPU to apply filters, process high‑resolution images, or render effects in real time. This means you can experiment with designs and see immediate results, dramatically speeding up your workflow.
    • Smart Enhancements: Integrated AI can automatically adjust lighting, reduce background noise during recording, or even suggest creative edits based on learned patterns from your previous work.

    Smarter Workstations for Businesses

    Businesses can benefit immensely from the rapid response times and enhanced capabilities offered by AI PCs:

    • Data Security and Privacy: Sensitive corporate data remains on the premises, processed locally rather than transmitted to distant cloud servers—mitigating potential security risks.
    • Increased Productivity: For professionals working on data analysis, financial modeling, or real‑time collaboration tools, the reduced latency of local AI processing means that complex algorithms run seamlessly, keeping projects on track even during peak business hours.
    • Seamless Virtual Assistance: AI PCs can power intelligent digital assistants that learn from user behavior, thereby offering personalized insights, automating routine tasks, or even organizing meetings. This integration helps streamline operations across the board.

    A New Era for Gaming and Entertainment

    The gaming industry is also poised to benefit from the advancements present in AI PCs:

    • Immersive Experiences: NPC (non‑player character) behavior in games can become more dynamic and responsive, driven by on‑device AI that adapts to the player’s style without any noticeable delay.
    • Enhanced Graphics: Live gaming experiences can incorporate real-time enhancements, such as dynamic lighting or scene adjustments, powered directly by the NPU working in tandem with the GPU.

    These real‑world applications demonstrate that AI PCs are not just a theoretical innovation—they’re actively changing the way we work, create, and interact with technology.

    Analyzing the Strengths and Weaknesses of AI PCs

    Despite their enormous potential, AI PCs aren’t without challenges. Understanding both the strengths and weaknesses will help users make informed decisions about how to integrate this technology into their daily lives.

    Strengths

    • Speed and Responsiveness: By processing AI tasks locally, users experience drastically reduced latency. Immediate results mean that tasks such as voice recognition or real‑time translation can be executed with minimal delay.
    • Privacy and Security: With local processing, sensitive data never leaves your machine. This helps protect your information from potential breaches or unauthorized access often associated with cloud‑based services.
    • Customizability: AI PCs can be tailored for specific workflows. Whether you’re optimizing for creative productivity or business analytics, the ability to design your own AI‑enhanced computing environment is a game changer.
    • Energy Efficiency: Optimized NPUs handle complex tasks without drawing the power that might otherwise be needed by CPUs or GPUs working overtime. This leads not only to lower energy costs, but also to a greener computing experience.

    Weaknesses

    • Hardware Costs: Integrating NPUs and advanced AI accelerators can drive up the cost of a system. While prices are expected to decrease over time, early adopters might face higher expenses than those sticking with traditional PCs.
    • Software Ecosystem Challenges: For AI PCs to reach their full potential, developers must adapt or create applications that can fully leverage local AI processing. Until software ecosystems mature, some users may not see immediate benefits beyond marketing hype.
    • Balance Between Local and Cloud: Some complex tasks that require massive computational resources may still necessitate cloud processing. Finding the right balance between local speed and the scale of cloud resources remains an ongoing challenge in the tech industry.

    The Future: Hybrid Models and Emerging Trends

    The evolution of AI PCs isn’t a zero-sum game between local and cloud processing. Increasingly, experts believe that the future lies in hybrid models that seamlessly blend the best of both worlds.

    Embracing the Hybrid Approach

    Imagine a scenario where your AI PC handles day-to-day tasks—think real‑time editing, personalized digital assistance, and secure data processing—while periodically connecting to the cloud for resource-intensive tasks such as training new machine‑learning models or processing massive data sets. Such hybrid architectures offer:

    • Best of Both Worlds: Enjoy the speed, privacy, and efficiency of local processing while tapping into virtually unlimited computational resources in the cloud when needed.
    • Dynamic Allocation: Software could intelligently decide which tasks are best handled locally and which require the robust infrastructure of cloud‑based processing, ensuring optimal performance at all times.
    • Continuous Learning: A hybrid system allows for real‑time fine‑tuning of AI models. While local NPUs may execute pre‑trained models, periodic cloud updates can enhance these models based on the latest innovations and global data trends.

    Emerging Hardware and Software Trends

    As the market for AI PCs matures, several key trends are set to define the future of on‑device AI:

    • Integration of AI Accelerators: Major chip makers are racing to integrate increasingly powerful NPUs into everyday systems. With each new generation, these NPUs promise even higher TOPS ratings, making local AI tasks faster and more efficient.
    • Enhanced Developer Toolkits: As companies like AMD, Intel, and Qualcomm refine their hardware for AI applications, software toolkits and libraries will evolve to help developers maximize their new machines’ potential. Improved compatibility and easier integration mean that over time, applications will be better optimized to capitalize on local AI power.
    • Security-First Architectures: With data privacy becoming an ever more critical concern, future AI PCs will likely incorporate advanced hardware-based security features. These innovations will ensure that even as AI becomes more powerful, it does not come at the expense of user privacy.
    • Industry Collaborations: Partnerships between hardware giants and software developers, as well as academic institutions, are anticipated to drive cutting-edge research. These collaborations will further demystify AI, ensuring that breakthroughs in local processing are accessible to a broad audience of users.

    Lessons from the Pioneers

    The pioneering efforts of companies like AMD have provided us with invaluable insights into the potential of AI PCs. AMD’s narratives on AI and AI PCs—highlighting how integrated NPUs, advanced CPUs, and robust GPUs can function as a cohesive unit—offer a roadmap for how the future of computing might look. Meanwhile, technology analysts have noted that AI PCs not only enhance performance but also promise to fundamentally transform the very nature of human‑computer interaction2.

    These insights are not mere technical details; they represent a shift in philosophy. Instead of treating technology as a distant service, AI PCs are designed to empower users by bringing intelligence directly to the device. This locally driven model positions AI as an accessible tool for creativity, productivity, and security—and sets the stage for deeper innovation in both hardware design and application development.

    Real‑World Impact: From Hobbyists to Enterprises

    Let’s consider how AI PCs are already impacting a range of users:

    • The Creative Professional: For photographers, video editors, and digital artists, the integration of AI allows for real-time adjustments, such as automated color grading or noise reduction. This means projects that once took hours can now be rendered in minutes, dramatically boosting productivity and creative expression.
    • The Business User: In an office setting, AI PCs equipped with locally processed AI can power intelligent scheduling assistants that learn employee habits, optimize daily workflows, and enhance collaboration through real-time language translation and voice recognition.
    • The Gamer: Gaming experiences are becoming more immersive. AI PCs can adjust in‑game environments on the fly, offering intelligent NPC behaviors and dynamic rendering techniques that respond to the player’s style—providing a gaming experience that feels both personal and responsive.
    • The Educator and Student: In educational settings, AI PCs can facilitate adaptive learning platforms. Applications can analyze student performance in real time and tailor educational materials to individual needs—all processed locally to ensure responsiveness and data privacy.

    Conclusion: Embracing a Future of Intelligent Computing

    The emergence of AI PCs marks a watershed moment in the evolution of personal computing. As we demystify AI and decode the intricacies behind these advanced systems, a clear picture emerges: we are on the cusp of a revolution where intelligence is embedded right into our devices. Instead of relying solely on distant cloud servers, AI PCs enable us to process data in real time locally—reducing latency, enhancing privacy, and ultimately empowering users like never before.

    From the dedicated NPUs that execute machine‑learning algorithms at breathtaking speeds to the hybrid models that blend local efficiency with cloud scale, the technology behind AI PCs is paving the way for a future where computing is both smarter and more personal. As innovative companies invest in next‑generation hardware and software, users from every walk of life—from creative professionals to businesses and educators—stand to benefit from these groundbreaking advances.

    At LJAweb.com, we are excited about the opportunities that AI PCs represent. Whether you’re looking to boost your personal productivity, safeguard your data at home, or revolutionize your business operations, the shift to on‑device AI processing offers a compelling glimpse into tomorrow’s technology. As we continue to monitor this dynamic space, one thing is clear: the future of computing is not just about faster chips or bigger data centers—it’s about intelligent, personalized experiences that make technology truly serve you.

    Embrace the power of demystified AI. Explore how local AI processing can transform your digital journey, and let your next PC not just meet your expectations but redefine them. The era of AI PCs is here—and it’s changing the way we interact with the world, one intelligent computation at a time.

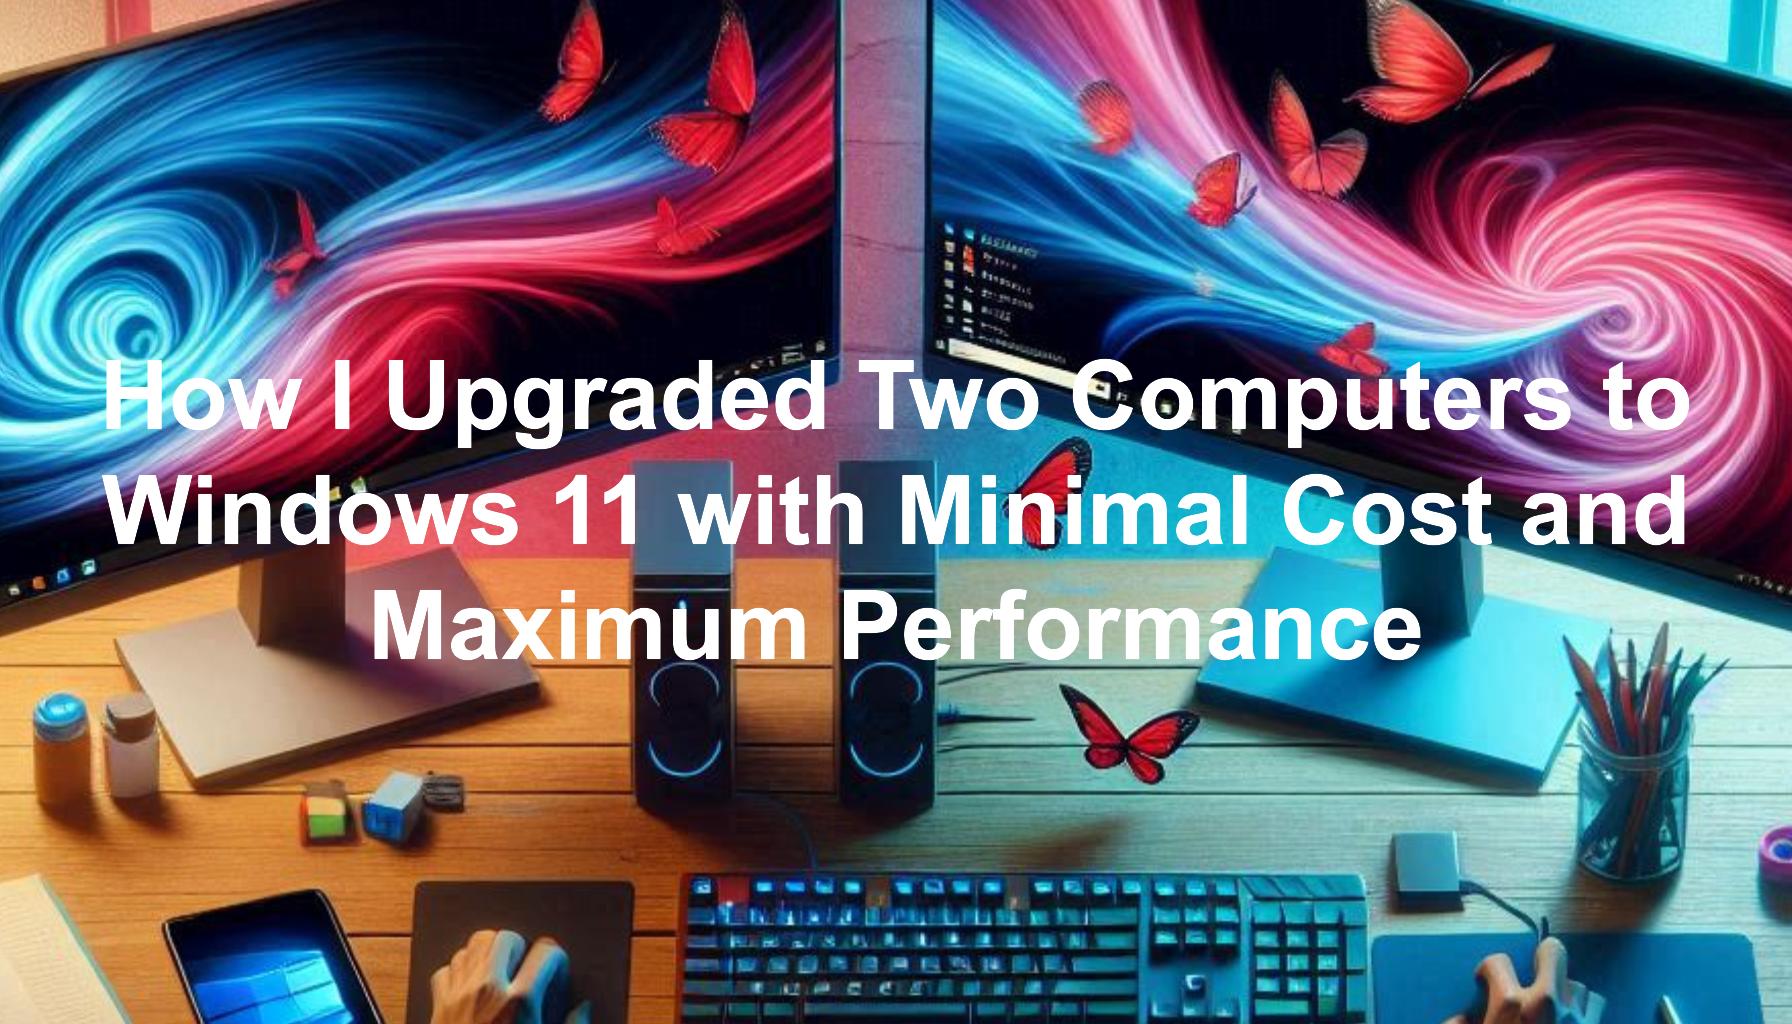
  • How I Upgraded Two Computers to Windows 11 with Minimal Cost and Maximum Performance

    How I Upgraded Two Computers to Windows 11 with Minimal Cost and Maximum Performance

    Hey, it’s Lewis here. I’m a computer repair guy who loves to help people with their IT problems. I’ve been doing this for a while now, and I’ve seen all kinds of issues and solutions. But recently, I had a challenge that was quite interesting and rewarding.

    I had to upgrade two computers to Windows 11, the latest operating system from Microsoft.

    Now, you may have heard that Windows 11 has some pretty high system requirements, and many computers are not compatible with it. You need a certain processor, memory, storage, graphics, and security features to run it. If you don’t have them, you’re out of luck.

    Or are you?

    Well, I’m here to tell you that there are ways to upgrade any computer to Windows 11, even if it is not compatible. And not only that, but you can also improve the performance and storage capacity of your computer, without spending a fortune.

    Sounds too good to be true, right?

    Well, it’s not. I did it, and I’m going to show you how.

    In this blog post, I’m going to share with you my tips and steps on how to upgrade any computer to Windows 11, and how to make it faster and more efficient. I’m going to tell you the story of how I upgraded two computers for two different customers, and what tools and tricks I used.

    You’ll learn how to:

    • Bypass the compatibility check with Rufus
    • Upgrade the storage with SSD
    • Clone the drives with Acronis
    • Move the user data to the HDD

    By the end of this post, you’ll have a clear idea of how to upgrade your own computer to Windows 11, or how to help someone else do it.

    You’ll save money and time, and you’ll make your computer run like new. Trust me, it’s worth it. So, are you ready to learn how to upgrade your computer to Windows 11 with minimal cost and maximum performance?

    Then let’s get started. 😊

    Tip 1: Bypass the Compatibility Check with Rufus

    The first thing you need to do to upgrade your computer to Windows 11 is to bypass the compatibility check. This is the process that Windows 11 uses to determine if your computer meets the minimum system Compatibility requirements. If it doesn’t, you won’t be able to install Windows 11 at all.

    But don’t worry, there is a way to bypass this check and install Windows 11 anyway. And the tool you need for this is called Rufus.

    Rufus is a free and open-source software that lets you create bootable USB drives with any operating system.

    You can use Rufus to create a bootable USB drive with Windows 11, and then use it to install Windows 11 on your computer.

    Here are the steps on how to use Rufus to bypass the compatibility check and install Windows 11 on any computer:

    • Download Rufus from [here] and run it on your computer.
    • Insert a USB drive with at least 8 GB of space into your computer.
    • Select your USB drive from the Device list in Rufus.
    • Download Windows 11 OS from [here].
    • In Rufus Click on the SELECT button and choose the Windows 11 ISO file that you have downloaded

    • Under the Image option, choose Standard Windows installation.
    • Under the Partition scheme, choose GPT.
    • Under the Target system, choose UEFI (non CSM).
    • Under the File system, choose NTFS.
    • Under the Cluster size, choose 4096 bytes.
    • Under the Volume label, enter a name for your USB drive, such as Windows 11.
    • Click on the Start button.
    • Now tick the boxes shown in the image.
    • Click OK and then again on the WARNING box and wait for Rufus to create your bootable USB drive with Windows 11.
    • When Rufus is done, close it and eject your USB drive from your computer.

    Now you have a bootable USB drive with Windows 11 that can bypass the compatibility check.

    You can now simply run setup.exe from the memory stick we just created and upgrade your current system as if it’s just a Windows update, so you keep all your programs and files.


    Alternatively, you can install to install Windows 11 on your computer, follow these steps:

    • Plug your USB drive into the computer that you want to upgrade to Windows 11.
    • Turn on your computer and press the key that opens the boot menu, such as F12, F10, or Esc. This may vary depending on your computer model and manufacturer.
    • Choose your USB drive from the boot menu and press Enter.
    • Wait for the Windows 11 setup to load and follow the instructions on the screen.
    • Choose the partition where you want to install Windows 11.
    • Click on the Next button and continue with the installation process.

    And that’s it.

    You have successfully bypassed the compatibility check and installed Windows 11 on your computer.

    Congratulations!

    But before you celebrate, you should know that this method has some benefits and drawbacks.

    Here are some of them:

    • Benefits:
      • You can save money and time by not having to buy a new computer or upgrade your hardware to meet the system requirements of Windows 11.
      • You can enjoy the new features and improvements of Windows 11, such as the redesigned Start menu, the new Taskbar, the Snap layouts, the Widgets, the Android apps, and more.
      • You can keep your files and settings from your previous Windows version, as long as you choose the option to keep them during the installation process.
    • Drawbacks:
      • You can reduce the security and stability of your system by bypassing the compatibility check and installing Windows 11 on an unsupported hardware. You may encounter errors, crashes, or performance issues.
      • You can void your warranty or violate your license agreement by installing Windows 11 on an incompatible computer. You may not receive updates or support from Microsoft or your computer manufacturer.
      • You can risk losing your data or damaging your computer by using an unofficial tool or script to bypass the compatibility check and install Windows 11. You should always backup your data and create a recovery disk before attempting this method.

    So, you should weigh the pros and cons of this method before deciding to use it.

    If you are not comfortable with the risks involved, you may want to buy a new computer that is compatible with it. But if you are feeling adventurous and want to try Windows 11 on your old computer, this method can help you do it.

    In the next tip, I’m going to show you how to upgrade the storage of your computer with SSD, and how it can make your computer faster and more efficient. Stay tuned. 😊

    Tip 2: Upgrade the Storage with SSD

    The second thing you need to do to upgrade your computer to Windows 11 is to upgrade the storage with SSD.

    SSD stands for solid state drive, and it is a type of storage device that uses flash memory instead of spinning disks.

    SSDs are much faster, quieter, and more reliable than HDDs, which are the traditional hard disk drives that use magnetic platters.

    Why do you need to upgrade the storage with SSD?

    Well, because Windows 11 requires at least 64 GB of free space on your system drive to install and run smoothly. If you have an old or small HDD, you may not have enough space for Windows 11, or you may experience slow performance and long boot times.

    By upgrading the storage with SSD, you can increase the storage capacity and speed of your computer, and make Windows 11 run like a dream.

    How do you upgrade the storage with SSD?

    Well, there are different ways to do it, depending on your computer model and configuration. But I’m going to show you how I did it for two computers: a laptop and a PC.

    For the laptop, I had a 128 GB SSD that was almost full with important photos and files. The laptop owner wanted to upgrade to Windows 11 and have more space for her data. So, I decided to upgrade the laptop’s internal storage with a larger SSD, and use the old SSD as a boot drive for the PC as there was no space to install two drives into the laptop, leaving me with one spare.

    Here are the steps that I followed:

    • I bought a new 256 GB SSD that was compatible with the laptop. I made sure it had the same form factor and interface as the old SSD which was 2.5″ SATA. You can check this by looking at the specifications of your laptop and SSD, or by opening the laptop and checking the SSD yourself. Be careful not to damage your laptop or SSD when doing this.
    • I shut down the laptop and removed the battery and the power cord. I opened the laptop case and located the SATA slot. I removed the old SSD from the slot and replaced it with the new SSD. I closed the laptop case and reconnected the battery and the power cord.
    • I turned on the laptop and checked if the new SSD was recognised by the BIOS and the operating system.
    • I cloned the old SSD to the new SSD using Acronis. I did this by first placing the new larger SSD into the laptop first, then connecting the old one back to the laptop using an external USB SATA caddy. I booted Acronis Image copy and cloned the old drive to the new one. Once completed, it all booted up perfectly.
    • I upgraded the laptop to Windows 11 using official methods as it was compatible. I made sure to choose the option to keep the files and settings from the previous Windows version during the installation process.

    And that’s how I upgraded the laptop’s internal storage with a larger SSD.

    The laptop owner was very happy with the result.

    She had more space for her photos and files, and her laptop was faster and more responsive.

    But what about the old SSD that I removed from the laptop?

    Well, I didn’t want to waste it, so I decided to use it as a boot drive for the PC. The PC had a 1 TB HDD that was slow and noisy. The PC owner wanted to upgrade to Windows 11 and have a faster boot time. So, I decided to use the old SSD from the laptop as a boot drive for the PC, and use the HDD as a data drive.

    Here are the steps that I followed:

    • I shut down the PC and unplugged the power cord. I opened the PC case and located the SATA slots. I removed the HDD from the slot and replaced it with the SSD. I connected the HDD to another slot using a SATA cable that came with the new SSD for the laptop. I closed the PC case and plugged in the power cord.
    • I turned on the PC and checked if the SSD and the HDD were recognised by the BIOS and the operating system.
    • I cloned the HDD to the SSD using Acronis. I did this by booting Acronis Image copy and cloning the old drive to the new one. Once completed, it all booted up perfectly.
    • The PC was already upgraded to Windows 11 using Rufus, as I explained in the previous tip. I made sure to choose the option to keep the files and settings from the previous Windows version during the installation process. However, it’s worthing noting that I would of normally upgraded the SSD first then Windows 11 update so the process would have been much shorter. I had to do it this way around as we upgraded to Windows 11 before we had a spare SSD to use.

    And that’s how I used the old SSD from the laptop as a boot drive for the PC. The PC owner was very impressed with the result.

    He had a faster boot time and a smoother performance.

    But what about the HDD from the PC?

    Well, we decided to use it as a data drive for the PC. I moved the user data to the HDD and freed up space on the SSD, as I will explain in the next tip. Stay tuned. 😊

    As you can see, upgrading the storage with SSD can make a big difference in your computer’s performance and capacity. But it also has some benefits and drawbacks. Here are some of them:

    • Benefits:
      • You can increase the storage capacity and speed of your computer by using a larger and faster SSD.
      • You can improve the boot time and the responsiveness of your computer by using an SSD as a boot drive.
      • You can reuse your old SSD or HDD for another computer or purpose, and save money and resources.
    • Drawbacks:
      • You can spend some money and time by buying and installing a new SSD or HDD for your computer.
      • You can require some technical skills and tools by opening your computer and replacing the SSD or HDD yourself.
      • You can risk losing your data or damaging your computer by cloning the drives or moving the data incorrectly. You should always backup your data and create a recovery disk before attempting this method.

    So, you should consider the pros and cons of this method before deciding to use it. If you are comfortable with the costs and risks involved, you may want to upgrade your storage with SSD and enjoy the benefits. But if you are not sure or confident, you may want to stick with your current storage or ask for professional help.

    In the next tip, I’m going to show you how to clone the drives with Acronis, and how it can make the transition easier and faster. Don’t miss it. 😊

    Tip 3: Clone the Drives with Acronis

    The third thing you need to do to upgrade your computer to Windows 11 is to clone the drives with Acronis.

    Acronis is a software that lets you create an exact copy of your drive and transfer it to another drive. You can use Acronis to clone your smaller SSD to your larger SSD, and your HDD to your SSD.

    Why do you need to clone the drives with Acronis? Well, because it can make the transition easier and faster.

    You don’t have to reinstall Windows or your applications, or copy your files manually. You can just clone your drive and have everything ready on your new drive. It’s like moving your house by teleporting it to a new location, instead of packing and unpacking everything.

    How do you clone the drives with Acronis?

    Well, there are different ways to do it, depending on your situation. But I’m going to show you how I did it for the laptop and the PC.

    For the laptop, I had to clone the old SSD to the new SSD, as I explained in the previous tip. I did this by using Acronis Image copy, which is a tool that lets you create an image of your drive and restore it to another drive. You can use Acronis Image copy from a bootable USB drive, or from a CD or DVD.

    Here are the steps that I followed:

    • I created a bootable USB drive with Acronis Image copy using Rufus, as I explained in the first tip. I downloaded Acronis Image copy from [here] and used Rufus to create the bootable USB drive.
    • I inserted the bootable USB drive into the laptop and turned it on. I pressed the key that opens the boot menu, such as F12, F10, or Esc, and chose the USB drive from the boot menu.
    • I waited for Acronis Image copy to load and chose the option to clone disk.
    • I chose the option to automatically resize the partitions to fit the new disk size.
    • I chose the source disk, which was the old SSD that I connected to the laptop using an external USB SATA caddy.
    • I chose the destination disk, which was the new SSD that I installed in the laptop.
    • I confirmed the operation and waited for Acronis Image copy to clone the old SSD to the new SSD.
    • I removed the bootable USB drive and the external USB SATA caddy from the laptop and turned it off.
    • I turned on the laptop and checked if everything was working fine on the new SSD.

    And that’s how I cloned the old SSD to the new SSD for the laptop. The laptop owner didn’t have to worry about losing any data or settings, or reinstalling any software. Everything was exactly the same as before, but with more space and speed.

    For the PC, I had to clone the HDD to the SSD, as I explained in the previous tip. I did this by using Acronis True Image, which is a tool that lets you backup and restore your drive to another drive. You can use Acronis True Image from within Windows, or from a bootable USB drive.

    Here are the steps that I followed:

    • I downloaded Acronis True Image from [here] and created a bootable USB.
    • I opened Acronis True Image and chose the option to clone disk.
    • I chose the option to manually resize the partitions to fit the new disk size.
    • I chose the source disk, which was the HDD that I installed in the PC.
    • I chose the destination disk, which was the SSD that I installed in the PC.
    • I confirmed the operation and waited for Acronis True Image to clone the HDD to the SSD.
    • I restarted the PC and checked if everything was working fine on the SSD.

    And that’s how I cloned the HDD to the SSD for the PC. The PC owner didn’t have to worry about losing any data or settings, or reinstalling any software. Everything was exactly the same as before, but with faster boot time and performance.

    As you can see, cloning the drives with Acronis can make the transition easier and faster. But it also has some benefits and drawbacks. Here are some of them:

    • Benefits:
      • You can save time and hassle by not having to reinstall Windows or your applications, or copy your files manually. You can just clone your drive and have everything ready on your new drive.
      • You can preserve your data and settings from your previous Windows version, as long as you choose the option to keep them during the cloning process.
      • You can create a backup of your drive and restore it in case of any problem or disaster. You can also use Acronis to create incremental or differential backups, which only backup the changes since the last backup, and save space and time.
    • Drawbacks:
      • You can spend some money and time by buying and installing Acronis on your computer. You may also need a license key to activate it and use all its features.
      • You can require some extra tools and software by using Acronis to clone your drives. You may need a bootable USB drive, a CD or DVD, or an external USB SATA caddy to connect your drives.
      • You can risk losing your data or damaging your computer by cloning the drives incorrectly or incompletely. You should always backup your data and create a recovery disk before attempting this method.

    So, you should consider the pros and cons of this method before deciding to use it. If you are comfortable with the costs and risks involved, you may want to clone your drives with Acronis and enjoy the benefits. But if you are not sure or confident, you may want to skip this method or ask for professional help.

    In the next and final tip, I’m going to show you how to move the user data to the HDD, and how it can help you optimize the storage and performance of your computer. Don’t go away. 😊

    Tip 4: Move the User Data to the HDD

    The fourth and final thing you need to do to upgrade your computer to Windows 11 is to move the user data to the HDD. User data is the data that you create and store on your computer, such as your documents, pictures, videos, music, downloads, and more. You can move the user data to the HDD and free up space on the SSD, and make your computer more optimized and efficient.

    Why do you need to move the user data to the HDD?

    Well, because it can help you balance the storage and performance of your computer. You see, SSDs are great for running Windows and your applications, because they are fast and reliable. But they are also expensive and limited in capacity.

    HDDs are good for storing your data, because they are cheap and large in capacity. But they are also slow and noisy. By moving the user data to the HDD, you can use the SSD for what it does best, and the HDD for what it does best. You can have the best of both worlds.

    How do you move the user data to the HDD?

    Well, there are different ways to do it, depending on your preferences and needs. But I’m going to show you how I did it for the PC.

    For the PC, I had to move the user data to the HDD, as I explained in the previous tip. I did this by using storage management, which is a tool that lets you manage the storage and location of your data on your computer. You can use storage management to move the user data to the HDD, including the downloads folder.

    Here are the steps that I followed:

    • I opened the Settings app on the PC and clicked on the System option.
    • I clicked on the Storage option and then on the Change where new content is saved link.
    • I changed the location of the new content to the
    • HDD, which was the D: drive. I did this for the documents, pictures, videos, music, and downloads folders. I clicked on the Apply button to save the changes.
    • I opened the File Explorer and navigated to the C: drive, which was the SSD. I located the user data folders, such as Documents, Pictures, Videos, Music, and Downloads. I right-clicked on each folder and chose the Properties option.
    • I clicked on the Location tab and then on the Move button. I browsed to the D: drive and selected the corresponding folder. I clicked on the OK button and then on the Yes button to confirm the move. I repeated this for each user data folder.
    • I checked if the user data was successfully moved to the HDD, and if the SSD had more free space.

    And that’s how I moved the user data to the HDD for the PC. The PC owner was very pleased with the result.

    He had more free space on the SSD and made it run faster. He also had more storage space on the HDD and made it more organized.

    But what about the laptop?

    Well, I didn’t have to move the user data to the HDD for the laptop, because it didn’t have an HDD. It only had a larger SSD that I installed, as I explained in the previous tip.

    So, I didn’t have to worry about the storage and performance of the laptop. It was already optimized and efficient.

    As you can see, moving the user data to the HDD can help you optimize the storage and performance of your computer. But it also has some benefits and drawbacks. Here are some of them:

    • Benefits:
      • You can free up space on the SSD and make it run faster and smoother. You can avoid filling up the SSD and slowing down your computer.
      • You can have more storage space on the HDD and make it more organized and accessible. You can store more data and find it easily.
      • You can customize the location and name of your user data folders. You can choose where and how to store your data on your computer.
    • Drawbacks:
      • You can make the HDD slower and more prone to failure by moving the user data to it. You may experience longer loading times and more noise from the HDD.
      • You can complicate the backup and recovery of your data by moving the user data to the HDD. You may have to backup and restore two drives instead of one, or use a different software or method.
      • You can risk losing your data or damaging your computer by moving the user data incorrectly or incompletely. You should always backup your data and create a recovery disk before attempting this method.

    So, you should consider the pros and cons of this method before deciding to use it. If you are comfortable with the risks and benefits involved, you may want to move your user data to the HDD and enjoy the advantages. But if you are not sure or confident, you may want to leave your user data on the SSD or ask for professional help.

    Conclusion

    And that’s it. You have learned how to upgrade your computer to Windows 11 with minimal cost and maximum performance. You have learned how to:

    1. Bypass the compatibility check with Rufus
    2. Upgrade the storage with SSD
    3. Clone the drives with Acronis
    4. Move the user data to the HDD

    By following these tips and steps, you can upgrade any computer to Windows 11, even if it is not compatible. And you can also improve the performance and storage capacity of your computer, without spending a fortune.

    You can save money and time, and make your computer run like new.

    I hope you found this blog post helpful and informative.

    If you have any questions or feedback, please leave a comment below or contact me directly. I would love to hear from you.

    Thank you for reading and using LJAweb.com. 😊

  • Outlook IMAP Duplicate Sent Emails Fix: Your Ultimate Guide

    Outlook IMAP Duplicate Sent Emails Fix: Your Ultimate Guide

    Introduction

    Hey tech friends! Ever found yourself scratching your head over duplicate emails in your Outlook Sent Items folder? You’re not alone. It’s like Outlook’s got a mind of its own, echoing our messages in a digital hall of mirrors. But why does this happen? Let’s pull back the curtain on this IMAP magic trick.

    The Duplicate Dispatches: My Personal Encounter with Outlook’s IMAP Quirk

    Picture this: a serene morning, the first sips of coffee warming my soul, and the soft clack of keys as I compose an email. It’s a routine as comforting as the dawn chorus. But one day, this harmony was disrupted by a curious case of déjà vu in my Sent Items folder. Yes, each email I sent was echoed by an identical twin.

    Determined to reclaim my inbox, I embarked on a quest for answers. I learned more about IMAP than I ever intended, delved into the intricacies of Outlook’s settings, and came out the other side with a solution. It was a victory, small but significant, in the grand scheme of the digital world.

    The Step-by-Step Spell to Banish Duplicate Sent Emails

    Alright, let’s roll up our digital sleeves and tackle this head-on. Here’s the step-by-step guide to fixing those pesky duplicate sent emails in Outlook when using an IMAP account.

    1. Open the Portal to Outlook: Fire up Outlook. This is where our journey begins.

    2. The Hidden Pathway: Navigate to the File menu, click on Account Settings, and then again on Account Settings.

    3. Select Your Trusty IMAP Account: Find your IMAP account and click Change.

    4. The Magical Checkbox: Look for the option that says Don’t save copies of sent items and check it.

    5. Seal the Enchantment: Hit Next, then Done.

      And there you have it! You’ve successfully navigated the labyrinth and emerged as the hero of your own story.

      Decoding the Duplicates: The Technical Tale of IMAP and Outlook

      IMAP is like the diligent librarian that keeps your email life in sync across all devices. Outlook uses IMAP to sync your emails, which means it reflects any changes you make across all your devices. When you send an email, Outlook saves a copy in your Sent Items folder, and IMAP does the same because it’s programmed to keep a record of every action you take.

      FAQs – Navigating the Nuances of Outlook’s IMAP Idiosyncrasies

      Got questions? I’ve got answers! Here’s the lowdown on some common queries:

      • Will the fix work across all my devices? 
        Absolutely! It syncs across all devices where you use Outlook with your IMAP account.
      • Does this fix apply to all email providers using IMAP with Outlook? 
        Generally, yes. Most IMAP servers will behave similarly when interacting with Outlook.
      • Can this issue occur with other email protocols, like POP3 or Exchange? 
        This particular issue is specific to IMAP accounts because IMAP syncs with the server to reflect changes across all devices.

      The Final Word on Outlook’s IMAP Duplicate Sent Emails

      We’ve navigated the murky waters of email duplication, armed ourselves with the knowledge to prevent it, and emerged victorious. Remember, the world of technology is ever-evolving, and so are the tools we use. From mastering your inbox to becoming an Outlook wizard, there’s always something new to learn.

      Join the Conversation and Expand Your Outlook Knowledge

      Now, it’s your turn to join the dialogue. Share your experiences, questions, or any mystical insights you might have in the comments below. Your contributions not only enrich our collective knowledge but also help fellow travellers on the path to email enlightenment.

      For those eager to delve deeper into the realm of Outlook and its many facets, check out these resources for more tips and tricks. Keep exploring, keep learning, and let the world of technology inspire you at every click.

      And with that, we conclude our epic tale. May your inboxes be orderly, your sent emails singular, and your digital life ever harmonious. Until next time, happy emailing!

    1. 9 Key Steps to Building a Great Small Business Website

      9 Key Steps to Building a Great Small Business Website

      How to get started

      quality website

      One of the first things people do when they find your business online is to check out your website. If your website is not user-friendly and looks like a high school project, you are missing a major opportunity to make a good first impression.

      And if your website does not do what it is supposed to do, you are also missing a major opportunity to connect with potential customers.

      In this article, we will look at 10 steps you should take to build a website that works for you.

      1. Plan Your Site

      Before you start building your site, you need to understand what your goals are for your website. Do you want to drive traffic and sell products? Do you want to build a community of customers? Do you want to provide information for existing customers?

      These are all questions you should answer before you start.

      If you do not know, that is okay. Just take a step back and think about what you want your website to do. If you do not have a clear idea of what you want your website to do, you are going to be building something that does not serve a purpose.

      2. Pick A Hosting Service

      hosting small business website

      Once you know what you want your site to do, you are ready to start building it.

      The first step is to find a web hosting service that will host your website. You can use Google to search for a hosting service in your area or you can use a website like HostGator.com.

      3. Choose A Domain Name

      You need to pick a domain name that reflects your business and your brand. If you are a local plumber, you might want to consider using plumber.com. If you are a local pizza delivery service, you might want to consider pizzahut.com.

      If you are a business that sells handmade candles, you might want to consider candle.com.

      If you are a business that sells custom-designed leather products, you might want to consider leather.com.

      4. Pick A Design Template

      website design template

      Once you know what you want your domain name to be, you need to pick a design template. There are a ton of options to choose from. You can choose from a simple WordPress theme, or you can choose to build your own website using something like Squarespace or Wix.

      If you are just starting out, you will want to choose a WordPress theme. If you are an experienced business owner, you might want to choose a website builder that will make it easy for you to build your own website.

      5. Create A Content Plan

      Once you have a website, you need to create a content plan. If you are running a blog, you need to plan out how you are going to create updated content for your blog. If you are going to provide content for your customers, you need to have a plan for how you are going to provide that content.

      This is also a wonderful time to think about what kind of content you want to share with your customers. Do you want to post quick tips on how to fix small business problems or do you want to author long articles about topics like entrepreneurship and small business?

      You also need to plan out what kind of content you want to share with your existing customers. You can create a community page on your website, but you are going to want to do more than just post information on that page.

      6. Start Building a website

      building a small business website

      Once you have a plan for your website and a domain name, it is time to start building it. You can use pur website builder based on WordPress. You can also build your website yourself if you are starting from nothing.

      You can use an online tool like WebsiteMapper.com to make it easy to make changes to your website.

      The bottom line is that you need to create your website in a way that will keep your customers coming back.

      7. Start Using Your Website

      Once you have your website, you are going to want to start using it.

      But before you do that, you need to make sure you have enough visitors on your website. You need to post regular updates, so your customers know what you are doing.

      Once you have your website up and running, you need to start sharing the content you have created with your existing and potential customers.

      8. Start Raising More Business Through Your Website

      small business website

      The way you promote your website is also important. You need to use social media to build your brand. You can post your content on Facebook and share it on Instagram. You can also use blogging platforms to get your website in front of your existing customers.

      You also need to promote your website with content. You can create infographics that show your customers how they can fix small business problems, or you can post short videos on YouTube.

      9. Start Raising More Business Through Your Website

      A website can help you get new customers in the door. But you also need to promote your business using all the methods we talked about in this article.

      With a few simple steps, you will be able to build a profitable business online and use your website to get even more business.

      Thanks for reading, see you again soon.

    2. How to clear cache on Instagram?

      How to Clear Cache on Instagram

      So, I just spend ages trying to find out how to clear cache on Instagram because I updated an image but the old one kept showing up even after I edited it. Now I have found out I thought I would share it with any readers who reach my page. Have fun.

      I will show you the browser cache clear then the Instagram app and Android / iPhone methods of clearing cache for the app.

      The caching behavior on Instagram is governed by the browser cache settings. If your browser is set to clear the cache periodically, it will automatically clear the cache for you. 

      See the browser cache settings in your control panel: 

      Mac 

      Settings > Safari > Advanced > Check “Clear all website data” 

      Windows 

      Settings > Internet Options > General > Settings > Delete Cookies and History > Delete 

      If you are using a browser that does not clear the cache by default, you may clear the cache for a single browser window by going to that window and pressing the refresh button. You can also clear the cache for all browser windows by clearing the cache from the Instagram application. 

      how to clear cache on instagram

      How to clear the cache within Instagram?

      If you have already been to the Instagram app and to the settings and set the option to clear the cache, you will have to clear the cache of Instagram and go back to the settings to set it again. 

      Open Instagram and click on your profile page, then the hamburger icon (), which is located at the top-right corner of the screen. 

      On the pop-up menu, select Settings and click on it. 

      In the settings menu, scroll down to the bottom of the page and select Privacy and click on it. 

      On the page that opens, scroll down to the bottom of the page and click on the Cookies icon, which is located at the bottom of the screen. 

      On the drop-down menu, select Clear Cache and click on it. 

      The Instagram app will now clear the cache and you will have to set it again to choose to clear the cache. 

      How to clear Instagram App Cache from mobile device

      Android smartphones come with built-in tools which can help you clear app cache and optimize your phone. But most of the users focus on RAM management, maximum storage space, and other hardware aspects and ignore the app cache. But, you should know how to clear app cache to get the best out of your Android smartphone.

      Most of the users end up clearing the app cache only when they run into performance issues. But, there are a number of other reasons like unwanted ads or caches of the apps that can be cleared.

      In order to clear the app cache on Android or any other mobile OS, you need to follow these steps.

      How to clear app cache on Android

      Step 1: Head to settings

      Step 2: Find the option called ‘app cache’ and tap on it.

      Step 3: Select the source for the app and select a responsible app.

      Step 4: Now tap on ‘clear app cache’ and confirm the same.

      Now, your phone will clear the app cache.

      How to clear Instagram app cache on iPhone

      For clearing app cache on iPhone, head to Settings -> General -> iPhone Storage -> App Management -> Clear Cache.

      To clear the app cache on Android, head to Settings -> Applications -> All -> Storage -> Clear Cache.

      To clear the app cache on iPhone, select ‘Clear Cache’ and confirm the same.

      how to clear cache on instagram

      I hope this has helped, I have only just figured it out myself and thought it was worth sharing. 

    3. How to clear cookies on iPhone, iPad, or iPod touch

      How to clear cookies on iPhone, iPad, or iPod touch and why

      When learning how to clear cookies on your iPhone it’s good to firs understand the benefits of cookies and what you will lose when you do clear them. With that knowledge you can safely clear them without worrying about losing passwords or logins to your favourite websites.

      Cookies can be helpful because they store your preferences and login information, but they can also slow down your device and track your web browsing activity. If you desire to clear your cookies, you may do so by following the instructions in this page.

      Safari on your iPhone, iPad, or iPod touch can be cleared of its history and cookies.

      Launch Safari on your iPhone, iPad, or iPod touch.

      Tap on the Safari menu bar at the top of the screen.

      Tap on the Clear History and Website Data button.

      Tap on the Clear History and Cookies button.

      Safari will clear all of your history and cookies.

      how to clear cookies on iphone your iPhone

      If you’re using an iPhone, iPad, or iPod touch, you can clear your Chrome history and cookies by following these steps:

      Launch Chrome on your iPhone, iPad, or iPod touch.

      Tap on the Chrome menu bar at the top of the screen.

      Tap on the Clear Browsing Data button.

      Tap on the Clear Cookies and Data button.

      Chrome will clear all your history and cookies.


      How to clear cookies on iPhone, iPad, or iPod touch 11

      To clear your cookies on the iPhone 11:

      1. Open the Settings app.

      2. Scroll down and tap on Safari.

      3. Tap on Clear History and Website Data.

      4. Tap on Clear Cookies and Data.

      Your cookies will now be cleared.

      Should I clear cookies on my iPhone

      This question has no right or incorrect answer; it is entirely dependent on your personal tastes. Cookies can be helpful because they store your preferences and login information, but they can also slow down your device and track your web browsing activity. If you wish to clear your cookies, follow the instructions in this page.

      How to clear cookies on iPhone se, iPad, or iPod touch

      To clear your cookies on the iPhone SE:

      1. Open the Settings app.

      2. Scroll down and tap on Safari.

      3. Tap on Clear History and Website Data.

      4. Tap on Clear Cookies and Data.

      Your cookies will now be cleared.

      How to block cookies on iPhone

      Now, you don’t need to delete cookies on iPhone manually or regularly because iOS 11 allows you to block cookies on iPhone.

      How to block cookies on iPhone:

      Step 1: Launch Settings app on your iPhone.

      Step 2: Scroll down and tap on Safari.

      Step 3: Tap on Advanced.

      Step 4: Now, tap on Website Data.

      Step 5: At last, tap on Remove All Website Data.

      how to clear cookies on iphone

      When you block cookies on iPhone, Safari will stop tracking your cookies. This will not delete the cookies that are already saved on your iPhone.

      The cookie blocking feature can be turned off too. How to turn off cookie blocking on iPhone:

      Step 1: Launch Settings app on your iPhone.

      Step 2: Scroll down and tap on Safari.

      Step 3: Tap on Advanced.

      Step 4: Now, tap on Website Data.

      Step 5: At last, tap on Remove All Website Data.

      I hope you found this article useful. Thanks for reading!